Tuesday, September 29, 2009

bread baking tools

I use all of these tools when baking bread. I thought I'd explain what each one is for. (Click on the name of the tool and it will take you to a place where you can buy it. I just found these places by searching on Google.)
_______________________________

Lame (bread slashing tool): A razor blade on a stick. It can be substituted for a very sharp razor blade, but it has a nice handle that makes neat slashes. Making slashes will help the bread rise in a controlled place while in the oven.

I got this at Sur la Table for $7.

Baker's couche: A rising cloth made from unbleached natural flax fiber. This is a better surface for rising bread than a towel because its rough texture doesn't let the dough stick. I hear that the surface absorbs some of the moisture in the dough, which gives the bread a thick crispy crust. It's also helpful for making a wall between loaves. Don't wash the couche! Keep flouring it and not washing it to create a better surface.

I got this from Sur la Table for $6.


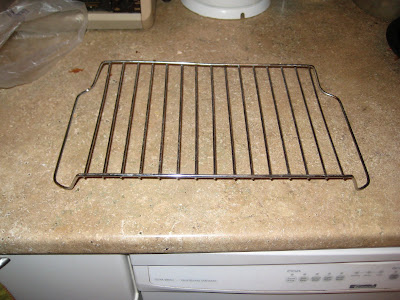
Cooling rack: When the bread comes out of the oven you should always let it cool before eating it! This is because cooling is part of the process of forming the crust and the structure inside. Just take the bread out of the oven, put it on the cooling rack for 15 minutes and it'll be ready to eat. It will still be warm and delicious.

We just had this cooling rack at our house.


Baking stone: This will conduct heat really well to get your bread hot enough to have a crispy crust and be baked evenly. You preheat it with the oven for an hour before baking the bread.

I don't have this yet, but I have a ceramic baking sheet that works. I've heard you can also just use an unglazed ceramic tile.

My friend Christian found this sheet at a garage sale, and it was like $10.


Plastic wrap: This is what you should cover your dough with so not much, but some, air gets in or out. It's good to spray it with oil before letting the dough rise because sometimes it will stick to the plastic and deform the dough.

You can get this at any grocery store.


Dough scraper: Indispensable for working with sticky dough. It's great for when you're first kneading the dough and it keeps sticking to the counter because you don't have to add extra flour. Adding extra flour makes the dough less wet and thus creates less bubbles. It's also great for helping you move the dough around.

I got this from a Goodwill store for $3.


Oil spray: So necessary! Otherwise you have to spread oil with a paper towel or your hands into plastic bags, saran wrap, pans, etc. and waste a lot.

I got this (actually an olive oil spray) at Trader Joe's for $3.

Monday, September 28, 2009

rate my video on youtube!


I don't think I won the Cuisinternship contest (see my post about it). However, I can still get something for making my video!


The highest rated video on youtube at the end of the promotion will win a gift basket.


Will you guys rate my video highly on youtube? Thanks!


Sunday, September 27, 2009

pizza napoletana - thin crust


These pictures aren't so great because it was dark, and the more beautiful pizzas got eaten in less than one minute. Paul Clay thought that adding the green pepper would make it look more beautiful. hmm. The pizza was so so good, though. This one has goat cheese and prosciutto.

I decided to try this out since I'd been making so much bread and the recipe for pizza crust is almost identical to white bread's.

It seems that people usually try making pizza before making bread, so their crust isn't so good, but since I've made so much bread, my pizza dough was great! It's all about letting it rest and developing the gluten by kneading (but don't knead too much). The flavor gets a lot better if you let it rest overnight because it gets more acidity through cool fermentation.

I used a tomato sauce (like pasta sauce) we made with tomatoes from our garden, Parmesan and Asiago cheese, and some toppings my friend Cooper got (green peppers and mushrooms, prosciutto, salami, onion slices, etc.)
_________________________

Makes 6 6-ounce pizza crusts

Ingredients

4 1/2 cups unbleached bread flour (if you use all-purpose flour, omit the olive oil)
1 3/4 tsp salt
1 tsp instant yeast
1/4 cup olive oil
1 3/4 cups water (ice cold)
Cornmeal for dusting

Directions

1. Whisk together the flour salt and instant yeast in a 4-quart bowl. With a large metal spoon, stir in the oil and the cold water until the flour is all absorbed. Stir until you get an even dough, repeatedly dipping your hands or the metal spoon in cold water. Reverse the circular motion a few times to develop the gluten further. The finished dough will be springy, elastic, and sticky, not just tacky, and be at about 50°F (10°C).

2. Sprinkle flour on the counter and transfer the dough to the counter. Using a metal dough scraper (or a sharp knife), cut the dough into 6 equal pieces. You can dip the scraper into the cold water between cuts to keep the dough from sticking to it. Sprinkle flour over the dough. Make sure your hands are dry and then flour them. Lift each piece and gently round it into a ball. If the dough sticks to your hands, dip your hands into the flour again. Transfer the dough balls onto a lightly-oiled pan. Mist the dough generously with spray oil and slip the pan into a large plastic bag. Alternatively, after oiling the balls, put each one in a separate plastic bag.

3. Put the bag into the refrigerator overnight to rest the dough, or keep for up to 3 days. If you want to save some of the dough for future baking, you can store the balls in individual bags in the freezer (these will last 3 months max.) Transfer them into the refrigerator the day before you plan to make pizza.

4. On the day you plan to make the pizza, remove the desired number of dough balls from the refrigerator 2 hours before making the pizza. Dust the counter with flour, and then mist the counter with spray oil. Place the dough balls on top of the floured counter and sprinkle them with flour; dust your hands with flour. Gently press the dough into flat disks about 1/2 inch (1 1/3 cm) thick and 5 inches (13 cm) in diameter. Sprinkle the dough with flour, mist it again with spray oil, and cover the dough loosely with plastic wrap. Let rest for 2 hours.

5. At least 45 minutes before baking the pizza, place a baking stone on a rack in the lower third of the oven. Preheat the oven as hot as possible, up to 800°F (430°C) (most home ovens will only go up to 500°F (230°C)). If you do not have a baking stone, you can use the back of a sheet pan, but don't preheat the pan.

6. Generously dust a pizza peel or the back of a sheet pan with cornmeal. Make the pizzas one at a time. Dip your hands, including the backs, in flour and pick up 1 piece of dough by getting under it with a pastry scraper. Reinhart recommends tossing the pizza like they do at restaurants, but I couldn't figure it out. I was nervous about ripping the dough, so I used a rolling pin. Start rolling it out with a lightly-floured rolling pin. Do a quarter turn after every roll to ensure radial symmetry. Also flip over once in a while, adding enough flour so that it doesn't stick. If the dough keeps springing back (mine did), let it rest for 5 to 20 minutes so the gluten can relax, and try again.

7. When the dough is stretched out to your satisfaction, lay it on the peel or pan, making sure there is enough cornflour underneath to allow it to slide. Lightly top it with sauce and then with your other toppings, remembering that the best pizzas are topped with a less-is-more philosophy. The American "kichen-sink" approach is counterproductive, as it makes the crust more difficult to bake. Usually 3 or 4 toppings are sufficient. Less is more!

8. Slide the topped pizza on to the stone (or bake directly on the sheet pan) and close the oven door. Wait 2 minutes, then take a peek. The pizza should take 5 to 8 minutes to bake. If the pizza baked faster on one side than another, or top than bottom, then rotate the pan or move the rack.

9. Remove the pizza from oven and transfer to a cutting board. Wait 3 to 5 minutes before slicing and serving to allow the cheese to set slightly.

A good choice for cheeses is: a fresh hard bread (ie. Romano, Asiago, Parmesan), a good "melter" (ie. Mozzarella, Cheddar, or Gruyere), and any favorite (ie. goat, blue cheese).


Recipe from Peter Reinhart's The Bread Baker's Apprentice, Mastering the Art of Extraordinary Bread

Saturday, September 26, 2009

multiseed whole wheat bread


Because Paul Clay keeps telling me that whole wheat bread is so much better for you than white bread, I made this bread. This is a juxtaposition of my loaf (R) and Richard Bertinet's loaf (L). What a lovely bread.

This is a present for Joel Wakeman on his birthday!
_____________________________

Ingredients

1 c white flour
2 1/3 c whole wheat flour
1/2 Tbsp yeast
3/8 c brown sugar
1/2 c dry milk
1 1/2 c water
2 tsp salt
2 eggs (one for the bread, one for the egg wash)
A mixture of seeds (eg. sunflower, flax, pine nuts, oats, etc.)

Directions

Mix dry ingredients, add water and egg.
Mix until you get a dough to form. Take out to the counter and kead for 5 minutes.
If it's still too dry, add water; too wet, add flour.
Let rise covered by a towel until doubled in volume.
Take out and form however you like (I did it with the same procedure as I showed in my video).
Preheat the oven to 450 F (230 C) one hour before baking.
Toast the seeds on a little bit of butter until golden.
Right before baking, brush egg wash (egg + pinch of salt), and roll the loaf on the seeds.
Bake until golden brown.


I adapted the bread recipe from the basic bread in the Tassajara Bread Book.
I got the idea of the seeds from Richard Bertinet's Dough.

Friday, September 25, 2009

mini baguettes for sale at Paradox on Friday


I just delivered my second batch of bread to the old Paradox cafe! I only made 12 this time instead of 18, mostly because I'm hoping to sell all of them. It turned out that last time I didn't sell 4 :( , so I made less this time. It's hard because two other people also sell pastries on Fridays, and not that many people buy food there. But I think this will work.

In any case, the most interesting part of this is that I'm learning how to live by the baker schedule:

Starting at 1 AM, when I got home, I made the dough in the bread machine.
At 2:30 AM I put the dough in the fridge and made more dough. You can only make the equivalent of 6 mini baguettes in one batch.
At 4:00 AM the machine broke, so I had to figure out how to fix it. Eventually it worked, and I got two batches of dough ready.
At 6:30 AM I took the dough out of the fridge to get it to room temperature.
From 7:30 to 8:15 AM I shaped the loaves. This took longer than I expected.
At 8:15 AM I started preheating the oven (takes 1 hr) to 450 F (230 C).
At 9:15 AM I scored the bread, put some loaves in the Le Creuset pot, and some on a ceramic baking sheet.
From 9:15 to 10:15 AM I baked all the little baguettes.
At 10:25 AM I delivered the baguettes with butter and Bonne Mamman raspberry preserves.
Now it's 11 AM and I'm going to sleep! I'm nocturnal!

Note 1: I called them baguettes, but they're actually French bread. Baguettes are much harder to make.
Note 2: I messed up sliding some loaves into the oven so they're oddly shaped. Lovely artisan bread.
_______________________________

Ingredients

3 1/2 cups unbleached bread flour
1/2 tsp yeast
1 1/2 cups water at room temperature
2 tsp salt

Directions (similar to beet bread directions)

Whisk flours and yeast together.
Add water and mix with a wooden spoon.
Knead on a counter until dough forms.
Let rest under plastic for 20 minutes.
Add salt and knead again until well mixed.
Let rise under plastic for 1 hour.
Preheat oven to 450 F (230 C) at least one our before baking. Remember to put the sheet in the oven before you preheat.
Take out dough, cut in half, and shape on the counter (business letter fold and rolling - watch video for guidance).
Put on a floured towel and cover with plastic. Let rise for an hour.
Slash bread with a razor blade.
Take baking sheet out of oven, put some corn meal on it, put bread on it.
Toss water in the oven to create steam and quickly close.
Bake for 15 minues (30 minutes in Le Creuset) or until golden brown.
Test to see if ready by tapping on bottom. If it sounds hollow, it's ready.
Let cool before slicing.


Alternative: Put all the ingredients in a bread machine and choose the dough setting. When it's done you can shape and bake. Easy!


Dano Wall made the signs.

Wednesday, September 23, 2009

basic sourdough bread


The first time I tried this recipe I was using a bread machine, so I decided to let it go through the whole process, including baking. I left, thinking that when I came back I'd have a lovely sourdough loaf waiting for me. Instead, I came home at night and the machine had caught on fire, and the dough had spilled all over the place. Fortunately, my friends Tom and Paul found it before it burnt the house down. OK, so maybe I shouldn't have expected so much from the bread machine since I got it used at a Goodwill. It still works wonderfully on the dough setting, though.


I'm not sure if I like this recipe for basic sourdough bread the best. I'm still investigating. You'll get dense, moist, tasty white sourdough bread.
_____________________________


Ingredients


4 3/4 cups bread flour 
3 tablespoons white sugar 
2 1/2 teaspoons salt 
1 (.25 ounce) package active dry yeast 
1 cup warm milk 
2 tablespoons margarine, softened 
1 1/2 cups sourdough starter 
1 extra large egg 
1 tablespoon water 


Directions


1. In a large bowl, combine 1 cup flour, sugar, salt, and dry yeast. Add milk and softened butter or margarine. Stir in starter. Mix in up to 3 3/4 cups flour gradually, you may need more depending on your climate.


2. Turn dough out onto a floured surface, and knead for 8 to 10 minutes. Place in a greased bowl, turn once to oil surface, and cover. Allow to rise for 1 hour, or until doubled in volume.


3. Punch down, and let rest 15 minutes. Shape into loaves. Place on a greased baking pan. Allow to rise for 1 hour, or until doubled.


4. Brush egg wash over tops of loaves, and sprinkle with chopped onion. 5. Bake at 375 degrees F (190 degrees C) for 30 minutes, or till done.

Saturday, September 19, 2009

beet bread

I made up this recipe, with an idea from R.L. Beranbaum's The Bread Bible. I made a video of how to make it, but I had never tried the recipe before I filmed the video (the video deadline was yesterday, so I had to make bread as quickly as possible.) In any case, I don't like whole wheat bread that much, but it is better for you than white bread. The beet juice gives the bread a nice red tint (the longer you boil the beets the darker the red tone), and it's also full of vitamins and sugars. The sugars are good for the yeast to rise, and they give the bread a slightly sweet taste. See the video in the post below.
________________________________

Ingredients

2 1/2 cups white bread flour
1 cups whole wheat flour
1 1/2 cups beet water (what's left from boiling beets)
1/2 tsp yeast
2 tsp salt

Directions

Whisk flours and yeast together.
Add beet water and mix with a wooden spoon.
Knead on a counter until dough forms.
Let rest under plastic for 20 minutes (autolyse: see bottom of post).
Add salt and knead again until well mixed.
Let rise under plastic for 1 hour.
Preheat oven to 450 F (230 C) at least one our before baking. Remember to put the sheet in the oven before you preheat.
Take out dough, cut in half, and shape on the counter (business letter fold and rolling - watch video for guidance).
Put on a floured towel and cover with plastic. Let rise for an hour.
Slash bread with a razor blade, sift flour on top.
Take baking sheet out of oven, put some corn meal on it, put bread on it.
Toss water in the oven to create steam and quickly close.
Bake for 15 minues (30 minutes in Le Creuset) or until golden brown.
Test to see if ready by tapping on bottom. If it sounds hollow, it's ready.
Let cool before slicing.


Autolyse refers to a particular period of rest after the initial mixing of flour and water, a rest period that occurs sequentially before the addition of yeast and other ingredients. This rest period allows for better absorption of water and allows the gluten and starches to align. Breads made with autolysed dough are easier to form into shapes and have more volume and improved structure.
(
Gisslen, Wayne (2008). Professional baking. New York: John Wiley)

cuisinternship contest

I just submitted a video entry for the Cuisinternship contest! See below. If I win, I get to spend a week learning with a famous chef in Portland, OR, and $1000. I would love to see the kitchens of the best restaurants in town and to meet all the best chefs. I could ask them so many questions! I'll hear back from them on the week of September 28th. Fingers crossed!

The recipe I filmed in the video is for beet bread. It had to be cut a lot because the video had to be at most two minutes long, so I omitted some important images. I'll post the recipe for the bread here tomorrow.


Friday, September 18, 2009

exciting! first bread for sale

I just delivered my first batch of bread for sale! I am baking bread every Friday and selling it at a cafe at school called the Paradox Cafe. French poppy seed rolls, $1.50 each! Raspberry preserves included in a little plastic container.

I couldn't get a picture of them because I was rushing to get them there at 10 AM. I was also sleepy because I went to bed around 2 AM after making the dough, and then had to be up at 6 AM to finish the process. It was as if I had a real bakery!

Wednesday, September 16, 2009

r.l. beranbaum's dvd

Rose Levy Beranbaum, author of The Bread Bible made a DVD! You can watch some of it for free on her website.

Tuesday, September 15, 2009

some questions about general bread-making

These are some questions I would ask a baker:

Question: What is the difference between fresh and non-fresh yeast?

Question: What are the different kinds of yeast? For example, active dry, instant? Is one better than the rest?

Question: Does using a Dutch oven really help the crust come out crispier? Is it really a replacement to injecting steam like they do in commercial ovens?
Answer: Yes! I borrowed my friend Luke's Le Creuset Dutch Oven and it made a huge difference! The crusts crackled and crisped and looked just like store-bought bread, but better. Now I just need something like 300 dollars to buy one! ahem....

To be continued...

some tips for general bread-baking

Here are some tricks I've learned while baking bread (I will keep updating these as I learn more about them):

- Always preheat the oven 1 hour before baking. This ensures that the oven is hot enough so the crust can be crackly and crunchy.

- Make sure the baking stone or sheet is in the oven so it gets hot too. Materials can crack if they experience a drastic change in temperature. The best option is to have a pizza peel with which you can slide the bread in and take it out without taking the baking sheet out.

- If you don't have a baking stone, you can use a regular metal baking sheet, but you should put a thick pot (like a cast iron pot) on the shelf below the sheet. This will distribute the heat evenly throughout the oven.

- What you want in bread is a strong structure. You can achieve this by using bread flour, which has lots of protein. This means there will be lots of gluten bonds that improve the dough's ability to retain gas as the dough rises and bakes.

- While kneading you shouldn't add any more flour than the required for the recipe. You can use a dough scraper or spatula to help you peel it and fold it, but you shouldn't make it drier. Keep in mind that the key to large bubbles is wet dough. Also for getting bubbles, it is important to add lots of air to the dough when kneading bread. This is done by folding the dough, never ripping holes through it.

- To get a crackly crust, you need some steam at the beginning of the baking process (in commercial ovens they inject steam). To achieve this at home, after putting the bread in, toss some water into the oven and quickly close the door. Some books recommend putting ice cubes in the pot under the baking sheet, but this can crack the pot because of the harsh temperature difference.

- You want to let the dough rise for as long as possible because this will provide more bubbles and acidity for taste, but you don't want to let the dough rise for so long because you want to have some of the sugar left from the carbohydrates in the flour-water combination. Achieving this balance is difficult and varies from bread to bread, but dough should never rise for more than 12 hours. A starter can rise and ferment for longer, but dough shouldn't.

- Always use the same towels for rising bread on. Don't keep washing them because the smell of soap will permeate your breads. Also, as you use them over and over you'll add flour so the dough doesn't stick.

- There is a technique called autolyse, introduced by famous French baker Raymond Calvel, which prepares the dough and helps achieve big fluffy bread. It is a process that works when you combine the flour and water in the recipe, mix them and let them sit for 20 minutes to an hour. Then add the salt and keep kneading until you reach the first rise. This prevents the salt from stopping the yeast from rising, and it allows the flour to hydrate and the enzymes to start working, particularly protease, which works to break down the protein in the flour. Autolyse creates more gluten bonds in the dough, which makes fluffier, lighter, bread.

- Let the bread cool after you've taken it out of the oven. Some of the structure of the bread is still forming at this stage. Resist temptation!

Monday, September 14, 2009

poppy seed bread


This is a version of the white French bread but I substituted 1/3 whole wheat flour instead of all white bread flour, and 1/3 milk instead of water. I also added egg wash (egg+pinch of salt) after baking to give it shine, and poppy seeds for loveliness.

english muffins


I made these a couple of weeks ago. I should have divided the dough into less, larger pieces, to make bigger English muffins. That way they would have been more moist and more delicious to eat. There were just too many this way, and they were a little dry. It's cheaper to make them than to buy them at the store, and they're really good toasted.

___________________________________________

Ingredients

1 cup milk
2 tablespoons white sugar
2 1/4 teaspoons (0.25 ounce) active dry yeast
1 cup warm water (45°C)
1/4 cup melted butter
6 cups all-purpose flour
2 1/2 teaspoon salt

Directions

Warm the milk in a small saucepan until it bubbles, then remove from heat. Mix in the sugar, stirring until dissolved. Let cool until lukewarm.

At the same time, dissolve yeast in warm water in a small bowl. Let stand until creamy, about 10 minutes.

In a large bowl, combine the milk, yeast mixture, butter and 3 cups flour. Beat until smooth.

Clean the sides of the bowl, cover with plastic wrap and let sit for 20 minutes.

Add salt and rest of flour, or enough to make a soft dough. Knead on a counter. Place in greased bowl, cover, and let rise until doubled in volume (about 1 hr, depending on the temperature of the room).

Punch down. Roll out to about 1/2 inch (1.3 cm) thick. Cut rounds with biscuit cutter, drinking glass, or empty tuna can. With the remaining dough, roll up, flatten and cut rounds again. Repeat until there is no more dough left. Sprinkle waxed paper with cornmeal and set the rounds on this to rise. Dust tops of muffins with cornmeal also. Cover and let rise 1/2 hour.

Heat greased pan. Cook muffins on pan about 10 minutes on each side on medium heat (350 F, 180°C). Allow to cool and place in plastic bags for storage.

To use, split and toast.


Photography: Adams Carroll
Recipe adapted from LindaPinda's recipe at http://allrecipes.com/Recipe/English-Muffins/Detail.aspx

bagels


These bagels were so delicious! If they didn't consume so much flour, and if I had lots of money I would make them every day. This recipe makes about 12 large bagels or 24 mini bagels. They have a great consistency and they're better than store-bought bagels. Maybe even in New York. That's maybe not true. They're so good!
__________________________________

Ingredients
SPONGE
1 tsp instant yeast
4 cups unbleached bread flour
2 1/2 cups water at room temperature

DOUGH
Ingredients
1/2 tsp instant yeast
3 3/4 cups unbleached bread flour
2 3/4 tsp salt
2 tsp malt powder or 1 Tbsp brown sugar
some cornmeal

FINISH
1 Tbsp baking soda
Cornmeal
Sesame seeds or poppy seeds or kosher salt

Directions
1. Stir the yeast into the flour in a bowl. Add the water and stir until it forms a sticky batter.

2. Cover with plastic wrap for about 2 hours. It should double in size and collapse when the bowl is tapped on the countertop.

3. In the same mixing bowl, add the additional yeast to the sponge and stir. Then add 3 cups of the flour and all the salt and malt. Stir until the ingredients form a ball.

4. Knead on a countertop for about 10 minutes. The dough should be firm, all the ingredients should be hydrated. The dough should feel satiny but not tacky.Divide the dough into 4 1/2-oz pieces for standard bagels, or smaller if desired. Form the pieces into rolls and let sit, covered with a towel for 20 minutes.

5. Form the bagels by either a) poking a hole into a ball, or b) rolling the ball into a snake and gluing the ends together. Spray oil on the bagels and cover with plastic wrap. Let sit for another 20 minutes. Put the pans in the refrigerator overnight (they can be in there for up to two days).

6. The following day, preheat the oven to 500 F (260 C).

7. Bring a large pot of water to a boil (the wider the better), and add the baking soda.

8. Remove the bagels from the refrigerator and gently drop them into the water, boiling only as many as comfortably fit. After one minute, flip them over and boil for another minute. For chewier bagels, extend the boiling time to 2 minutes per side.

9. Put the boiled bagels on a baking sheet that has been sprinkled with cornmeal. If you want to top the bagels, do so as soon as they come out of the water.

10. When all the bagels have been boiled place the pans on the two middle shelves in the oven.

11. Bake for 5 minutes, then rotate the pans (switching shelves and given the pans a 180-degree rotation. After the rotation lower the oven temperature to 450 F (230 C). Bake until golden brown.

12. Let the bagels cool for at least 15 minutes before eating.


Recipe from Peter Reinhart's The Bread Baker's Apprentice

Followers